
WordPress Now Days Used By All Over World For Making Websites and More Things.Wordpress is More Than used By To Create Many Things and WordPress Covers More Features to Posting Something in Very Easy Steps. All The People Used WordPress for Creating Dynamic, Static Blogs in WordPress. Plugins are Heart of WordPress to Create, Build, and Execute of Anything. WordPress Visual Editor Application is Look like Better in Dashboard.
If You want To Make WordPress Post Better Than, You Need to Special Visual Editor Here I Share How to Make Attractive Post or Enable Advance Features in WordPress Visual Application of Editor.It is more powerful to customize your WordPress visual editor program. It’s Easy to Make Post with Different Toolbars Like Font Family, Font Size or Different Formats. No need To Go in Text Editor Here I Share Plugin which Makes Your Visual Editor To Dynamic.
Contents
How To Make WordPress Visual Editor Dynamic?
- First Go Plugin Link and Install In WordPress.
- After Install Go To in WordPress Dashboard in Settings >> TinyMCE Advance.
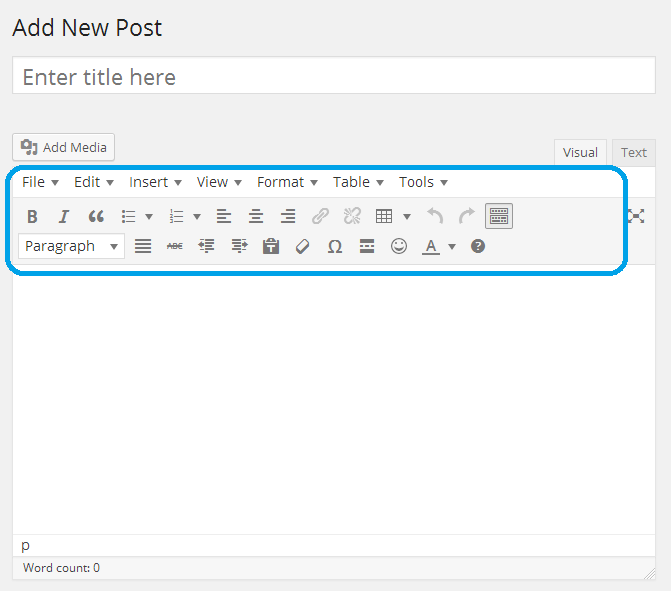
- Design Your Toolbar By Drag and Drop As You Like.

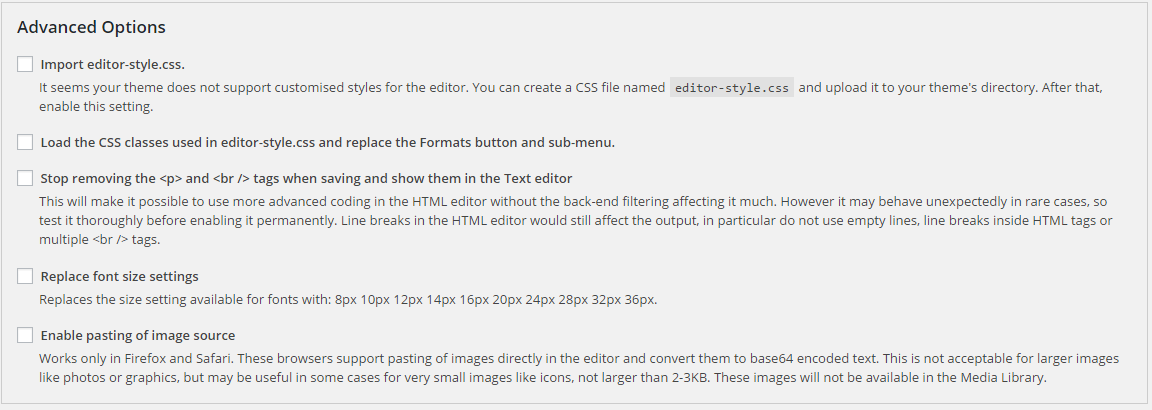
- You can Also Enable Advance Option For Visual Editor.
- Now Save Setting and Go To Post >> Add New Post. View Your Visual Editor Dynamic Look.
Features Of TinyMCE Advance Plugin.
- Table: You Can Create Table By Just Select Row & Column in Box.
- List: You can Add Different Items of List Like Circle, Square etc.
- Modify: You Can Personalize or Modify Tool By Just Drag and Drop.
- Font: You Can also Change Font Family and Font Size.
Some of Tutorial to Add Tables and More in Post.
How to Insert Table in The Post Easily Without Going to Code Editor?
Step 1: Go To Post >> Add New Post.
Step 2: Here Visual Editor in Above Toolbar See Table >> Insert Table and Select How Many Rows and Column Needed.
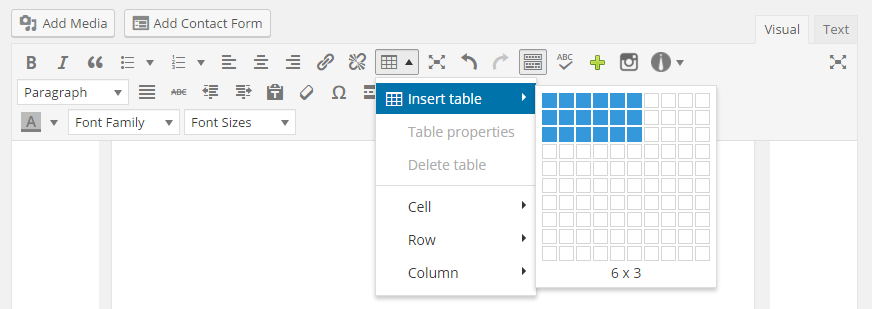
Step 3: All Done Successfully.
How to Change Background Color Without Going to Code Editor?
Step 1: Go To Post >> Add New Post.
Step 2: Write Something Text and Select Then Choose in Above Toolbar Background Color.
Note: Here I add Background Color Tool By Going to Setting >> TinyMCE Advanced. You Must Add First.
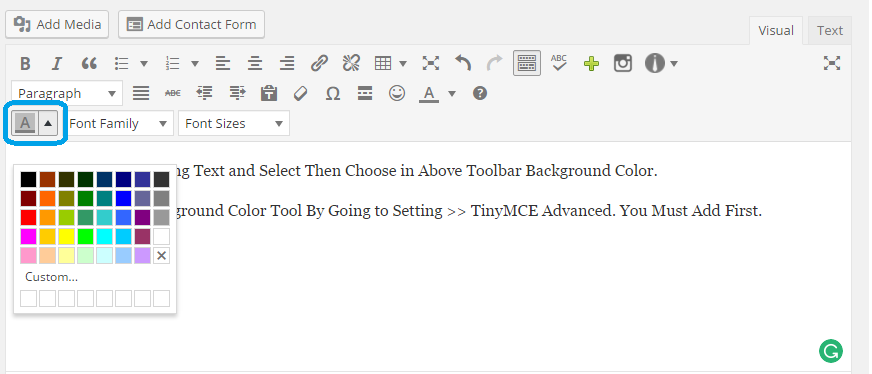
Step 3: All Done Successfully.
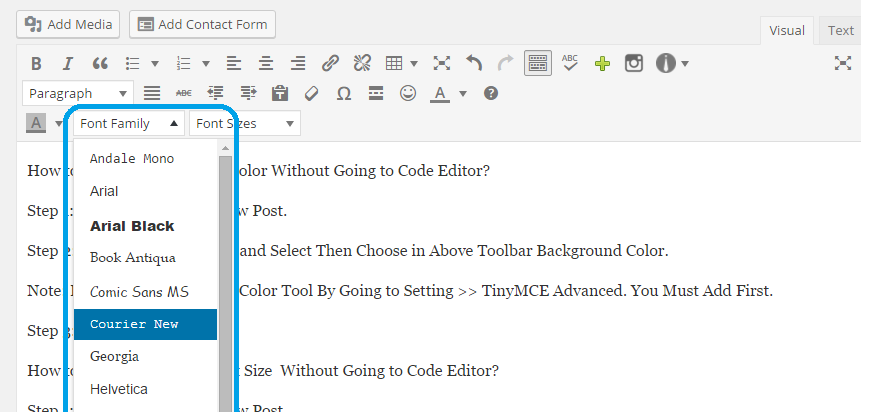
How to Change Font Family Without Going to Code Editor?
Step 1: Go To Post >> Add New Post.
Step 2: Write Something Text and Select Then Choose in Above Toolbar Font Family.
Note: Here I add Font Family Tool By Going to Setting >> TinyMCE Advanced. You Must Add First.
Step 3: All Done Successfully.
How to Change Font Size Without Going to Code Editor?
Step 1: Go To Post >> Add New Post.
Step 2: Write Something Text and Select Then Choose in Above Toolbar Font Size.
Note: Here I add Font Size Tool By Going to Setting >> TinyMCE Advanced. You Must Add First.

Step 3: All Done Successfully.
For All Your Need Go To Setting >> TinyMCE Advanced and Make Your Personalization Visual Editor. Which Tool You Like Which is Useful Just Drag and Drop There and Make Your Own Visual Editor.This Tool is More Useful to Make Post Attractive Because All of Your Tools Easy Access No Going to Cod Editor Just one Click You Access All Toolbar.
Any Other Query Regarding It. Just comment here we will help You Soon.