
What does a CPU fan do?
The CPU, often referred to as the brain of the computer, contains numerous printed circuit boards and chips. When we run an excessive number of programs on the computer, these chips and circuits are pushed to their maximum capacity, resulting in increased heat generation.
Since excessive heat can be detrimental to the system, it throws CPU fan error and it becomes crucial to cool down the computer when the temperature exceeds a certain threshold. This is where the CPU fan plays a vital role. It efficiently dissipates the excess heat by supplying cool air, effectively preventing any potential harm and safeguarding the system from damage.
What is CPU fan error?
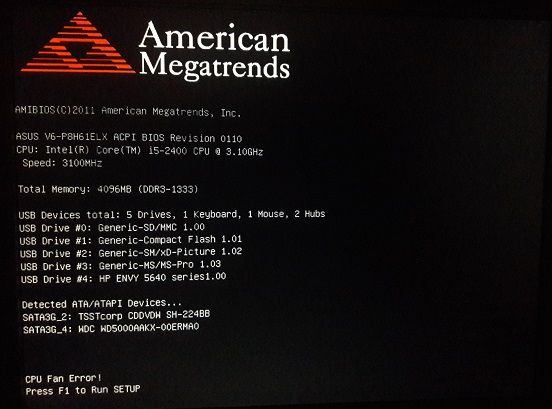
The “CPU Fan Error” or “Error: CPU Fan Has Failed” message appears on the screen when you start up a computer that has shut down due to overheating, and the CPU fan was unable to adequately cool it down. This error message is infrequent during regular computer usage but commonly arises during the boot-up or startup process.
If the error message doesn’t appear and the forced shutdown doesn’t occur, the computer would continue to overheat without a properly functioning CPU fan. This prolonged overheating could lead to permanent damage to multiple components within the CPU.
So, despite the annoyance caused by the error message, it actually serves as an important safety measure. It indicates that your computer is adhering to safety guidelines and is functioning properly by preventing potential damage due to overheating.
What might cause it?
The appearance of this specific error message on your screen can be triggered by various factors. It could result from physical damage that the CPU fan may have incurred, incorrect settings, or external factors pushing the fan to run at abnormally high speeds in an effort to cool down an overheated system.
Additionally, even the presence of dust or other objects obstructing the system’s air vents can lead to such malfunctions. To troubleshoot the CPU fan error and prevent the computer from shutting down, the first step would be to clean the system thoroughly.
Fix CPU Fan Error
To address the CPU fan error, there are several troubleshooting steps you can take. Without further delay, let’s dive right into them.
Source: Tomshaw Forum
1. Altering your computer’s position
The CPU fan error might be consistently triggered by the position of your computer. If the CPU is regularly exposed to high levels of electromagnetic radiation from sunlight or excessive heat from other sources, it can put a strain on the CPU fan. A simple solution to this issue would be to relocate the system to a cooler location.
2. Avoid overclocking
Overclocking involves pushing the chips in the CPU beyond their specified limits to achieve higher performance. However, this results in a significant increase in heat generation, surpassing the capabilities of the CPU fan to effectively cool the system.
3. Keeping the air vents clean
Accumulation of dust and debris on air vents disrupts proper air circulation, leading to a decrease in the overall cooling process. This issue can be resolved by cleaning the vents using a vacuum cleaner, an airgun, or other suitable cleaning methods.
4. Keeping the CPU fan clean
To clean the fan, you can use an appropriate method such as a brush, a vacuum cleaner, or an airgun. However, before opening the CPU, make sure to power down the computer and disconnect it from the power source.
Note :
- Refrain from using any cleaning reagents.
- Before proceeding with any method that involves opening up the device, it’s essential to consider the warranty implications. Opening certain devices may void their warranty.
5. Check the CPU fan
On occasion, the CPU fan may become loose or dislodged from its position. In such cases, you can try securing the fan using glue or a screwdriver. It is also advisable to perform periodic checks to ensure the fan remains in place and functions properly.
6. Ensuring the location of the fan
The fan should be properly connected to the CPU header on the motherboard. If it is connected to a different header or if there are multiple headers available, relocating the connection to the correct CPU header would resolve the error.
7. Adjusting settings in BIOS
BIOS, short for Basic Input Output System, is software stored on a small memory chip located on the motherboard. To access BIOS, you need to restart your computer and watch for an “entering setup message” displayed in the first few seconds. Then, press the required key as indicated. In some cases, when you receive the initial CPU error message, you may be prompted to press the F1 key to access BIOS.
Once you have accessed the BIOS, proceed with the following steps:
- Select Advanced Settings > Hardware Monitor > CPU Fan.
- Enable Active Heat Sink and Fan Duct with Fan and disable Passive Heat Sink and Fan Duct without Fan.
- Save your changes and exit BIOS.
If the CPU fan is functioning correctly, and the system is not experiencing overheating issues, you can use the BIOS settings to resolve the error by making the necessary changes.
To achieve this, open BIOS and select Monitor > Fan Speed Monitor > N/A > Ignore > Exit > Save Changes.
7. Replacing the CPU fan
If none of the above solutions have resolved the issue, it is likely that the fan is damaged and requires replacement. You can find a suitable replacement by searching for your processor model online, which will present you with related fan options.